
Intro
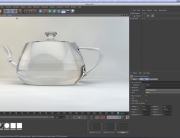
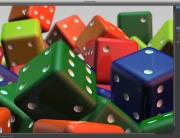
Hello and welcome to this tutorial which is actually an addition to my last tutorial which you can find overhere. This is what we have now. And this is the final result!
Create a target camera and circle spline
We will make a camera that pans around the bowl. Lets add a circle. Change the plane to XZ and increase the radius 4000. After that, add a camera. We will choose the Target camera. What a target camera does is this: It always points at the target. So if we change the position of the target the camera still follows it. We can keep it in the middle so it points at the bowl. Now we want to align the camera to the circle spline.
Align to spline
Click with the right mouse button on the camera, select Cinema 4D Tags/Align to spline. Now drag the circle into the spline path. Like this. As you see the camera lined up with the circle spline. Now we can adjust the position of the camera by changing the position value. As you see the camera will point at all times to the Camera Target.
Keyframes
We are going to create keyframes in order to get some camera movement. Go to frame zero, hold command or control on they keyboard and hit the the icon next to the position. Now the icon will turn red. This means frame zero has a keyframe on the position value. Go to frame 450, change te position value to 90% and do the same. Now we have our second keyframe. Cinema 4D will calculate the position based on those 2 keyframes.
Project Settings
Go to the project settings and change the maximum time value and preview max time value to 600. After that, go to the emitter, select the particle tab and change the lifetime of the marbles to 600.
Circle movement
Now we will bring some movement in the height of the circle on which the camera rotates. So go back to from zero. Select the circle, go to the coordinates tab, and change the ‘Why’ value to Minus Thousand. Make it a keyframe, go to frame 450 and change the ‘Why‘ value to 1500 and make it a keyframe.
We have a black icon here. This means the camera is off. Hit it and it will turn white. This means the camera is active in the perspective view. This is how the animation looks like right now.
Turn off the Collider body/Smash the marbles
Go to the Bowl, select ‘Collider Body‘/Dynamics. Here you see that the Collider is enabled. Next to it you see a keyframe button. This means we can turn it on and of with our keyframes. So go to frame 450. Make a keyframe, go one frame forward, uncheck enabled and make a keyframe. What will happen is that the collider body will not ba active from frame 451. So all the marbles will fall down.
So make a movement in some movement in the camera by changing the height of the Camera target. Select frame 450, make a keyframe at the Y, go to frame 521 and change the value to minus 3000.
Create a floor
The last thing we will do is create a floor. You will see a square but the floor will cover the whole horizontal space. Bring the hight down to minus 3000. Make a material for it. Make the color black, uncheck Specular, add a reflection and change it to 10%. Then add the material to the floor. The last thing you have to do is add a Collider Body to the floor so the marbles bounce against the floor.
Render it out and enjoy the result. Oh there is one last thing. You see the HDRI image in the reflection of the floor. In order to change that go to the Sky Compositing tag. Hit the tab Exclusion and drag the floor into the area below. Thats it! Now you are ready to render!
My name is Ferdy Korpershoek and I will see you next time.
Here is a little bonus. If you have After Effects. Double click in the project area to import footage. Find your sequence that you rendered with Cinema 4D and import it as a sequence. Here you have the video. Click with your right mouse on the sequence and select Interpret Footage/Main. Change the framerate to 25.
Make a new composition by dragging the sequence to this icon and add Reel Smart Motion Blur. A plugin by REVision. It will create some motion blur in the scene to make it more realistic. After that you can add some glow to the sequence. Play around with it till you are satisfied and then export it!