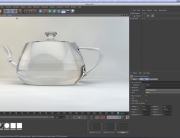
In this scene our some self created Iphones that are falling to the ground. If I render this you will see that the image is perfectly sharp. There is no motion blur even though there is a lot of movement in the falling Iphones.
Reel Smart Motion Blur
There are more ways to create motion blur for a moving scene. The first and fastest way to do it is to export the animation to After Affects and add Reel Smart Motion Blur to the scene. This will create motion blur based in the movement that the plugin detects by examine all the frames. This is a fast way and gives a very nice result if the movement in de scene is not to fast. The only bummer is that the Reel Smart Motion Blur comes with a price.
Physical camera
But we have Cinema 4D. So lets create motion blur in Cinema 4D. It will take more time but the result will be better. In order to do that go to the render settings and change the renderer to Physical. Then select Add Motion Blur and set the sample quality to ‘Low‘. Close this screen and go to the camera of the scene. You need a camera in the scene in order to create motion blur.
Shutter Speed
Go to the physical tab and change the value of the Shutter Speed in order to increase or decrease the motion blur. The longer the shutter speed, the more motion blur you will get. So lets go for 125th of a second.
Sample Quality
If you render this in the active view you will see no motion blur. You need to render it with the picture viewer. As you see there is some movement in the scene but it looks very grainy. That why we need to change the Sample Quality. Go to the render settings, physical and change the sample quality to High. Now if we render you will see that the quality if this motion blurred render is amazing! Unfortunately it will cost more time to render.
This was it for now. Have a great day and I will see you next time!


